What is the SharePoint Apps look like?
SharePoint Apps are at list of Apps in Testing on Developer Site look like

A SharePoint App with auto create an SPList that all columns come from a Content Type and the content type use fields defination from an Site Column look like

Now we start to update Visual Studio 2012 with the Office and SharePoint 2013 Apps templates then step by step to make the app: Define fields for an FPC Appointment Site Column, new an content type that use the site column then create a new SPList that use all the fields from the content type. Whenever the app deploy to SharePoint Online server all the creation steps will play automatically.
1. The default project templates with Visual Studio 2012

2. Download Microsoft Web Platform Installer 5.0 from http://www.microsoft.com/web/downloads/platform.aspx

3. Run wpilauncher.exe then choose [ Microsoft Office Developer Tools for Visual Studio 2012] to download and install

4. Installing Microsoft Developer Tools for Visual Studio 2012

5. App for SharePoint 2013 is ready to use

6. Team Site of SharePoint 2013 online look like
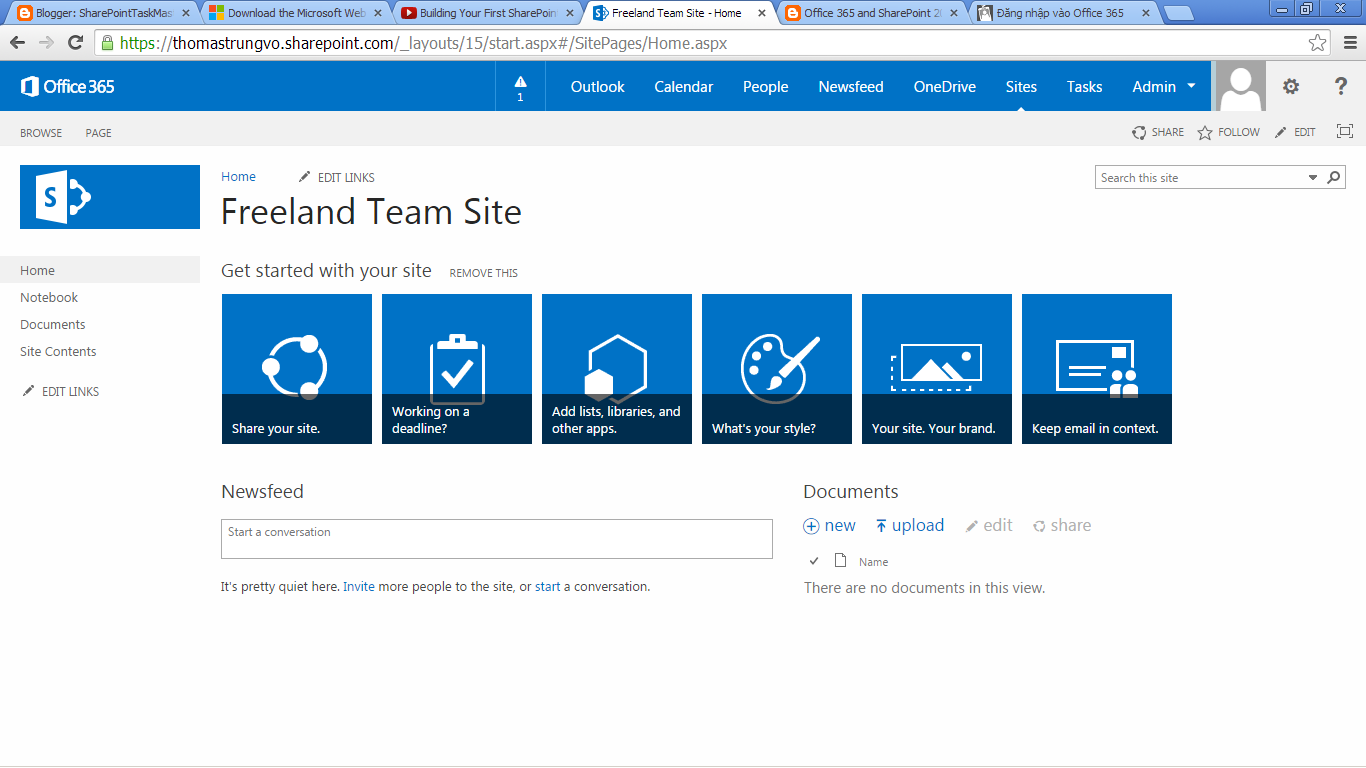
Office 365 and SharePoint 2013 online register and configuration, step by step
7. After click OK with the new app before we see the [Specify the app for SharePoint Settings] dialog box. At [What SharePoint site do you want to use for debugging your app?], choose a sharepoint url site collection. Here I choose my SharePoint Online site collection. and then click on [Validate].

8. Sign in with an Office 365 account to validate the SharePoint Online site collection

9. Connection successful to SharePoint Online site collection

10. Choose SharePoint-hosted for [How do you want to host your app for SharePoint?] then click [Finish] button

11. The default code of Default.aspx page look like

12. SharePoint Controls toolbox and structure of SharePoint App project look like

13. General properties of the development package for the app

14. Permissions information of the development package for the app

15. Permissions list of each Scope of the development package for the app

16. Autohosting prerequisites

17. Capability prerequisites

18. List of language culture combinations supported by this app. To specify a locale for an app feature, right-click the feature's node in the Solutions Explorer and choose Add Feature Resource

19. Remote Endpoints: Specify one or more remote domains for quering a remote service. The web proxy validates whether the requests issued to the remote domains are declared in the app manifest.

20. FPC Appointment Report lool like

21. Add a New Item to current app project (Ctrl + Shift + A)

22. Choose Site Column then click on Add

23. The default code of Elements.xml file

24. Add a new field

25. Add ID for field

26. Click on Tool -> Create GUID to create a GUID for the field
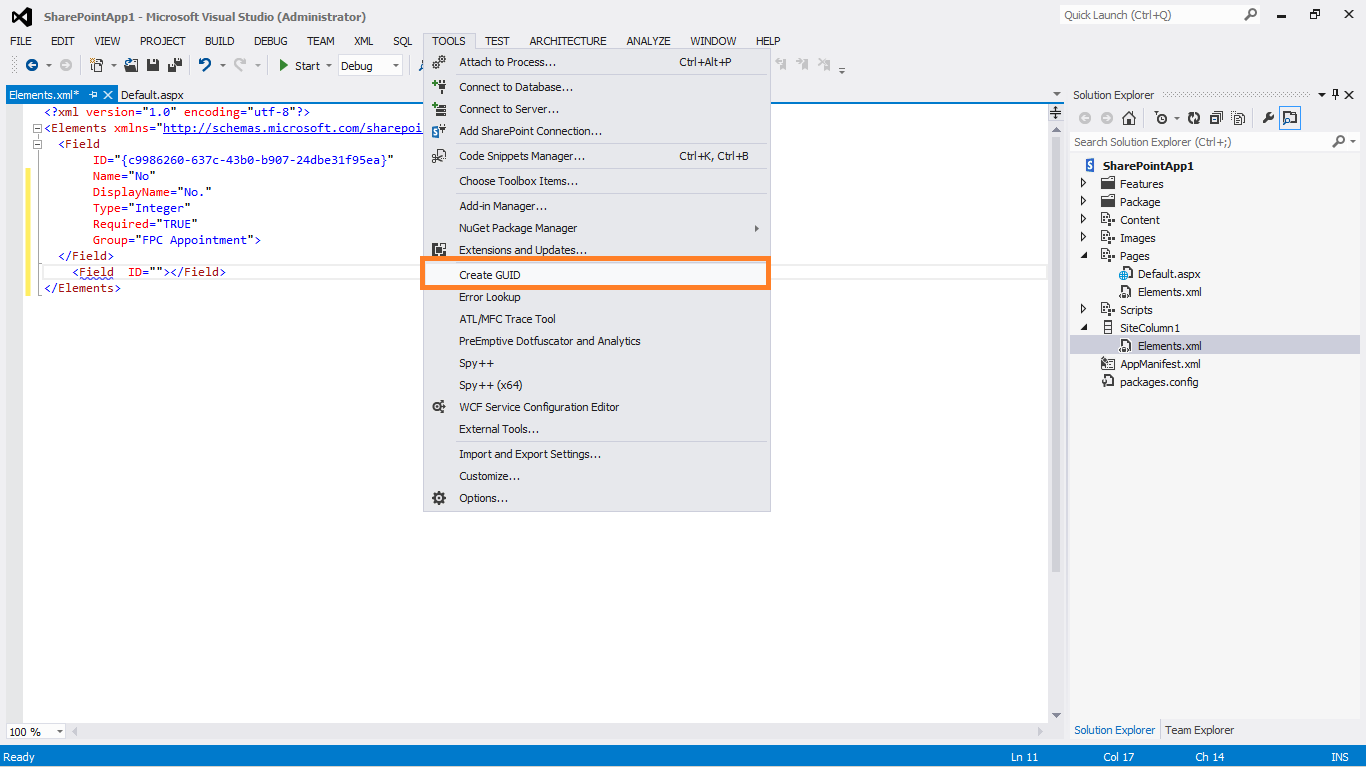
27. Choose 4. Registry Format(ie. {xxxxxxxx-xxxx...xxxx}) then click [New GUID]
%2Bthen%2Bclick%2B%5BNew%2BGUID%5D.png)
28. Copy generated GUID then click Exit to ID property

29. Past the copied GUID as the value for ID

30. The GUID for ID look like

31. Custom fields defination look like for FPC Appointment

32. Right-clickon SiteColumn1 then click on Rename

33. Put FPCAppointment for SiteColumn name

34. Click to add a new item (Ctrl+Shift+A)

35. Choose an [Content Type] from Office/SharePoint template then click on [Add]

36. List base content type 1

37. List base content type 2

38. List base content type 3

39. Choose Item as the base content type then click [Finish]

40. All Site Clumns look like

41. Type No for select Number order column that we define before at FPCAppointment site columns

42. Type App then click on "Appt. Order" to select AppoinmentOrder site column to become the second column for the content type

43. Why "Appt. Time" not display for select that mean it is not exit?

44. Duplicate the IDs of Appt. Date and Appt. Time so Appt. Time not yet create inside FPC Appointment site columns

45. Create New GUID for ID of Appt. Time field

46. All columns of content type look like

47. Can be choose FPC Appointment name for the content type

48. Right-click on ContentType1 then click on Rename to change the name

49. The name content type changed to FPCApptContentType

50. Click to add New Item to SharePoint App1

51. Choose FPC Appointment for the name of List

52. Choose Default(Custom List) for [Create a customizabe list template and a list instance of it] then click Finish
%2Bfor%2B%5BCreate%2Ba%2Bcustomizabe%2Blist%2Btemplate%2Band%2Ba%2Blist%2Binstance%2Bof%2Bit%5D%2Bthen%2Bclick%2BFinish.png)
53. Click on [Content Types] to select content types to add to FPC Appointment SPList

54. Right-Click on each content type name then click [Delete Del] to delete the two default content type

55. Choose FPCAppointment content type for the SPList

56. Click on [OK] after choose FPCAppointment content type for the SPList

57. All columns of FPC Appointment SPList with FPCAppointment content type look like

58. All Items view look like

59. SPList Title. location, description .. properties look like

60. Open Output windows information when debug, build or run

61. Output windows default position look like

62. Click on BUILD then click on [Build SharePointApp1] to make a build for the SharePoint App

63. Build succeeded

64. Click on BUILD then click on [Deploy SharePointApp1] to deploy the SharePoint App to SharePoint Online server that we choose when created project before (at step 7)
.png)
65. Can not deploy to SharePoint Online Server, we will check what is wrong: Sideloading of apps is not enableon this site

66. Click on New under [Site Collections] then click on [Private Site Collection]

67. Developer Site's information

68. Creating Developer Site

69. Developer Site is ready to use

70. Developer Site look like

71. Click VIEW then click on [Properties Window] or press F4 to display Properties Window of solution

72. Change Site URL of SharePointApp1 to location Developer Site

73. Sign in to the Office 365 again with the Developer Site URL

74. Succeddfully created package, uploading app for SharePoint and successfully installed app for SharePoint

75. Browse the app from location https://thomastrungvo-7a81f6ccc98f27.sharepoint.com/sites/Dev/SharePointApp1/

76. There is a problem when browse to [All Items] view of FPC Appointment SPList from URL https://thomastrungvo-7a81f6ccc98f27.sharepoint.com/sites/Dev/SharePointApp1/Lists/FPC%20Appointment/AllItems.aspx

77. The reason is have a wrong spelling
<Field ID="{F9DA9418-C77C-4BA8-9461-5520AB770B8F}" Name="AppointmentDate" DisplayName="Appt. Date" Type="Datetime" Required="FALSE" Group="FPC Appointment"></Field>from field define xml code
Must replace Datetime by DateTime
78. Correct fields defination for FPC Appointment without Address, we will use the available Address site column for FPC Appointment content type

79. Also correct the FPC Appointment content type look like

80. Remove FPCAppointment content tye at[Content Type Settings], delete all columns that generated by the FPCAppointment content type, save and add the new FPCAppointmentcontent type to [Content Type Settings] for generate the new columns format

81. Change the SPList name to FPCAppointment

82. Change Start page to loading the default view of FPCAppointment SPList

83. The new deploy with the correct of fields defination is well

84. The FPCAppointment SPList is loading well with All Items default view

85. New Item form look like of the FPCAppointment SPList

86. SharePointApp1 just added at [Apps in Testing] list on Deleloper Site

87. Click on Publish to Office Store from Developer Site

88. Sign in to Seller Dashboard by an Outlook account

89. Seller Dashboard information look like

90. Individual Registration Detail

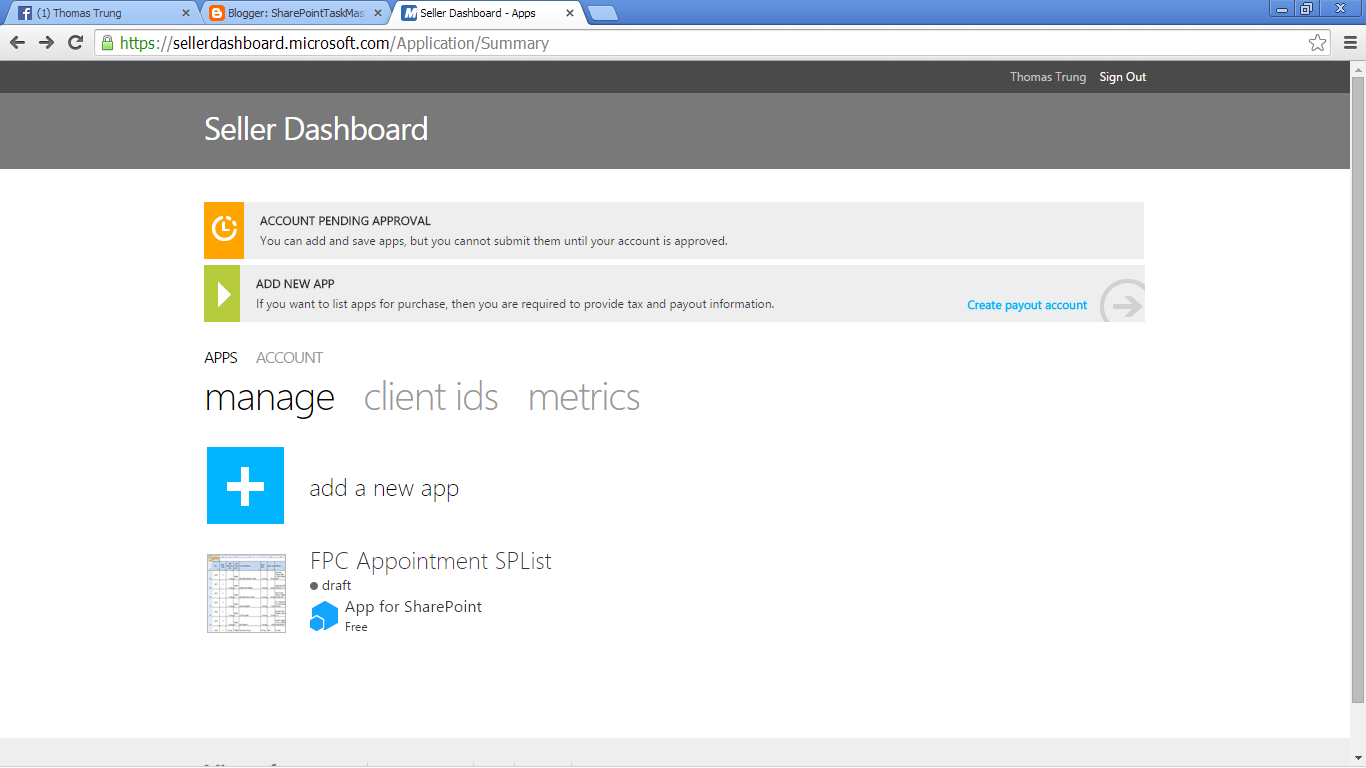
91. Seller Dashboard manage Apps look like

92. Seller Dashboard Account detail

93. Add a new SharePoint App

94. Click on plus icon of AppPackage then select a SharePoint App with extention is .app

95. Testing note and support document link look like

96. Choose a language for App

97. New App For SharePoint Details

98. FPC Appointment SPList SharePoint App is ready on Apps list
99. Seller Dashboard is Approved look like

100. Click on [SUBMIT DRAFT FOR APPROVAL] to wait the FPC Appointment SPList is approved

101. Click YES to accept the submition app for approval


103. Inital scan status of VERIFICATION PROGRESS

104. Need 5 days for validation

105. Changes requested draft status

106. Changes requested for app overview information

107. First Validation Test Results of FPC Appointment SPList SharePoint App
First Validation Test Results for FPC Appoinment SPList SharePoint App.pdf

108. FPCAppointment dot png size 96X96 px used for App Package icon

109. Choose the Icon for app package is identical to that submitted via the Seller Dashboard and the app title in app manifest is the same with the app title submitted via the Seller Dashboard

110. Must have one Locale and Resource File in Supported Locales for the first review

111. Deploy again after choose an icon, put app title the same with app title submitted via Seller Dashboard and put an locale

112. If not yet Trust a viewing account so can not have a access to the sharepoint app
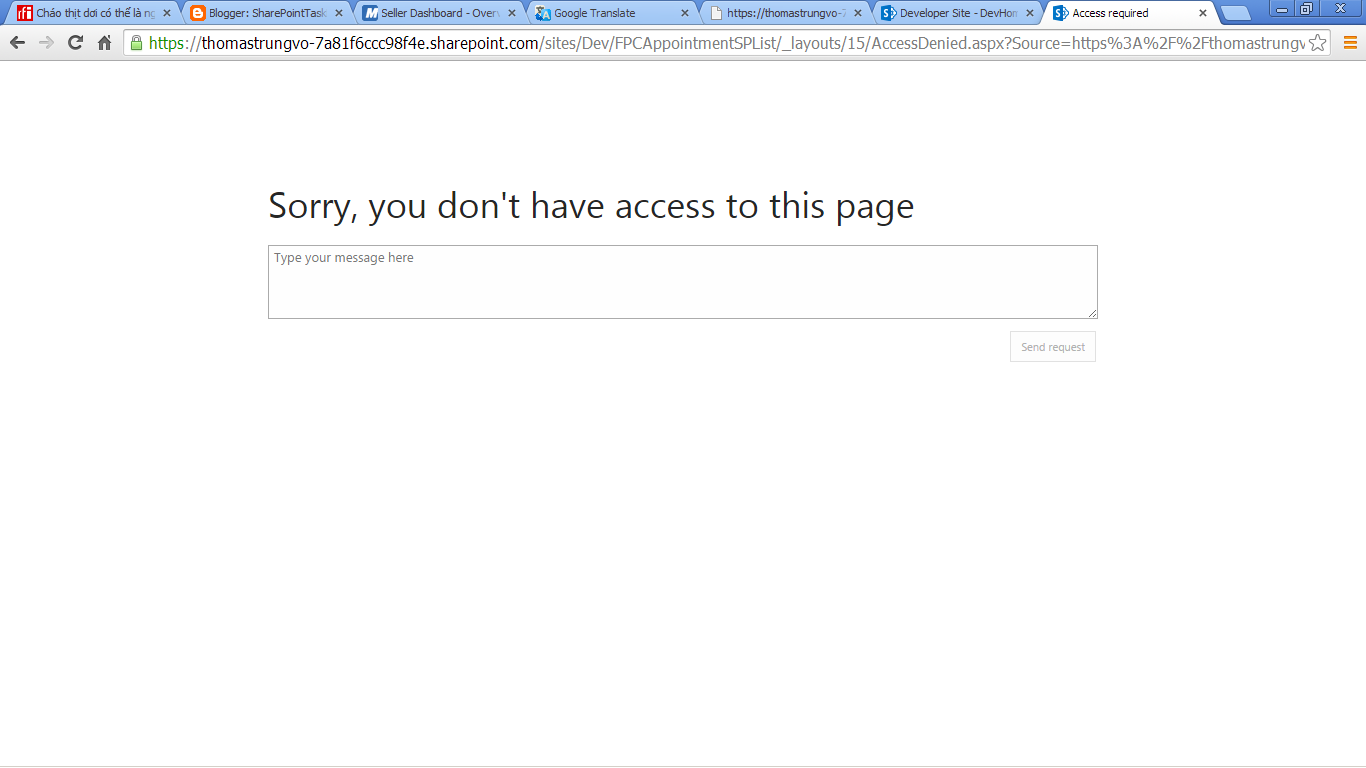
113. Click on MANAGE PERMISSIONS to trust a login account for the sharepoint app

114. Trust FPC Appointment SPList

115. FPCAppointment sharepoint app run well after change title, icon and put an locale

116. Select the app file that rebuilded with the change about title, icon and locale

117. Put the corrent url http://sharepointtaskmaster.blogspot.com/2014/09/make-sharepoint-app-step-by-step.html for Support Document Link and Privacy Document Link

118. SUBMIT FOR APPROVAL again after correct as giudline from the first Valation Test Results of changes request status

119. Thank you for listing your app with the Office Store

120. Second time pending approval of PFC Appointment SPList sharepoint app

121. Validation in progress status

122.
123.
124.
125.
God bless us!
References:
1. Building Your First SharePoint 2013 App With VS 2012—SVNUG Presentation
2. Apps for Office and SharePoint samples
3. Office 365 APIs Preview
4. Beginning_Sharepoint_2013_Development
5. Professional_Sharepoint_2013_Development
6. Exploring_Microsoft_Sharepoint_2013
Nice work, Thomas! Thank you very much!
ReplyDelete